Showing posts with label recent comments. Show all posts

Friday, 26 April 2013

Expandable Recent Comments Widget for Blogger/Blogspot

This Expandable Recent Comments is a very accessible widget that can be collapsed or expanded through user interaction, so that now, we don't have to click on the commenter or post title link in order to see the content of a comment.
recent comments widget, blogger gadgets, blogspot tricks

The expanding content can be shown or hidden by clicking on the plus/minus icon or by pressing the "Show all" or "Hide all" button at run time.

How To Add The Expandable Recent Comments Widget to Blogger

Step 1. Log in to your Blogger dashboard and go to Layout > Click on "Add a Gadget" link


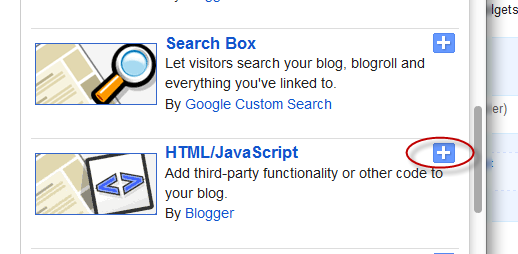
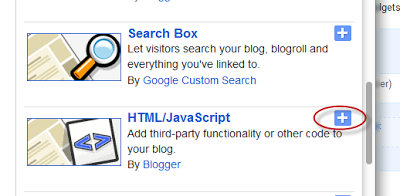
Step 2. From the pop-up window, scroll down and click on the HTML/JavaScript widget

Step 3. Copy and paste this code inside the empty box:
<style type="text/css" media="screen">
.row-aa {        background: #f2f2f3; }
.row-bb {        background: #F8F5F1; }
.row-div { 
  margin:0px;
  padding:5px;
}
.comment-header {
  font-size:0.9em;
//  border:1px solid #E0E0E0;
//  background-color:#F3F3F3;
  padding:4px;
  margin-top:10px;
  margin-bottom:5px;
}
.comment-box {
  margin:0px;
  padding:0px;
  font-size:0.9em;
  height:500px;
  overflow:auto;
}
.comments1  { 
//  background: #F3F3F3;
  padding:3px;
  border-left:1px dashed #A6A6A6;
  color: #888888;
  font-style: italic;
  padding-top:4px;
  margin-bottom:5px;
}
.comment-footer {
  text-align:center;
  font-size:0.9em;
  padding:4px;
  margin-top:5px; 
}
</style>

<div style="text-align: center" class="comment-header"><input class="comment-button" id="commshowall" type="button" onclick="if (this.value == &#39;Show all&#39;) { unfold_all(this); this.value=&#39;Hide all&#39;; } else { fold_all(this); this.value=&#39;Show all&#39;; }" style="width:8em;font-size:1em;font-family:Verdana,sans" value="Show all" /></div>

<div class="comment-box">
<script type="text/javascript" src="http://helplogger.googlecode.com/svn/trunk/expandable-recent-comments.js"></script>
<script type="text/javascript"  src="http://helplogger.blogspot.com/feeds/posts/default?start-index=1&max-results=999999&alt=json-in-script&callback=showrecentposts">
</script>
<script type="text/javascript"  src="http://helplogger.blogspot.com/feeds/comments/default?start-index=1&max-results=999999&alt=json-in-script&callback=showrecentcomments">
</script>

</div>

Note: Replace http://helplogger.blogspot.com with your blog/site address.

Step 4. Save your widget and you're done!

Enjoy :)
Read more ...


Tuesday, 13 March 2012

Add Recent Comments Widget with Avatars To Blogger

In one of my previous tutorials, I have shared a simple Recent Comments widget having the ability to display the lastest comments published on the blog posts, however the main disadvantage of it was that it didn't have the option of showing the users' avatars, so for those who need something more, I would recommend adding this stylish Recent comments widget with round avatars and comment excerpts. Besides having the option of displaying the avatars of commenters, we can also change the default image for the anonymous avatar.

So let's begin adding it...


How to add recent comments widget with avatars


Step 1. Go to Blogger Dashboard, select your blog and go to Layout, then click the Add a Gadget link.

avatars, recent comments blogger, blogger widgets

Step 2. When the popup window appears, scroll down and choose HTML/Javascript


Step 3. Copy and paste the following code inside the empty box:
<style type="text/css">
ul.helploggercomments{list-style: none;margin: 0;padding: 0;}
.helploggercomments li {background: none !important;margin: 0 0 6px !important;padding: 0 0 6px 0 !important;display: block;clear: both;overflow: hidden;list-style: none;word-break:break-all;}
.helploggercomments li .avatarImage {padding: 3px;
background: #fefefe;-webkit-box-shadow: 0 1px 1px #ccc;-moz-box-shadow: 0 1px 1px #ccc;box-shadow: 0 1px 1px #ccc;float: left;margin: 0 6px 0 0;position: relative;overflow: hidden;}
.avatarRound {-webkit-border-radius: 100px;-moz-border-radius: 100px;border-radius: 100px;}
.helploggercomments li img {padding: 0px;position: relative;overflow: hidden;display: block;}
.helploggercomments li span {margin-top: 4px;color: #666;display: block;font-size: 12px;font-style: italic;line-height: 1.4;}
</style>
<script type="text/javascript">
//<![CDATA[
    // Recent Comments Settings
    var
 numComments  = 5,
 showAvatar  = true,
 avatarSize  = 60,
 roundAvatar = true,
 characters  = 40,
 showMorelink = false,
 moreLinktext = "More »",
 defaultAvatar  = "https://blogger.googleusercontent.com/img/b/R29vZ2xl/AVvXsEhhKuvjP38uuFiGHyyNg63eAvRBXc6j9Y9DunUET0TBlTdzd82ISsLuE3MqFtfUhpGq6OiePgQ6VJugMj5ao82yCPfou_eYbjtsxGnw2m9r3j-TU4NU5WuH6vEkKVqHqHoPDjRtd3lDmYiT/s1600/default-avatar.jpg",
 hideCredits = true;
//]]>
</script>
<script type="text/javascript" src="http://helplogger.googlecode.com/svn/trunk/helplogger/[helplogger.blogspot.com]recent-comments.js"></script>
<script type="text/javascript" src="http://helplogger.blogspot.com/feeds/comments/default?alt=json&callback=helploggercomments&max-results=5"></script>
Note

- replace http://helplogger.blogspot.com/ with the name of your blog.
- by default, there will be displayed a number 5 comments - replace the "5" values in red in order to show more comments
- to change the anonymous avatar, replace the following address with the url of your image:
https://blogger.googleusercontent.com/img/b/R29vZ2xl/AVvXsEhhKuvjP38uuFiGHyyNg63eAvRBXc6j9Y9DunUET0TBlTdzd82ISsLuE3MqFtfUhpGq6OiePgQ6VJugMj5ao82yCPfou_eYbjtsxGnw2m9r3j-TU4NU5WuH6vEkKVqHqHoPDjRtd3lDmYiT/s1600/default-avatar.jpg
- to change the size of the avatar, replace 60 value in green.

Step 4. After you've made the changes, click Save... and we're done!

Once a reader finds a recent comments widget in your blog's sidebar, he comes to know that you blog is pretty active and that encourages him to post comments on your blog. In this way you can gather some active user base to comment on your blog posts.
Read more ...


Sunday, 11 March 2012

Recent Comments Widget For Blogger


The Recent Comments Widget for Blogger displays the recent blog comments on your blog's sidebar, showing a snippet of the last comments along with the title of the post to which the comment was made. If you want to encourage your readers in leaving comments on your blog, this is a widget I would recommend.

How To Install The Recent Comments Widget For Blogger

Step 1. Go to your Blogger Dashboard >> Layout >> Add a Gadget


Step 2. From the pop-up window, scroll down and choose the HTML/JavaScript option:


Step 3. Now copy and paste the below code in the HTML/JavaScript box:

<script style=text/javascript src="http://helplogger.googlecode.com/svn/trunk/recent comments widget.js"></script><script style=text/javascript >var a_rc=5;var m_rc=false;var n_rc=true;var o_rc=100;</script><script src=http://your-blog-name.blogspot.com/feeds/comments/default?alt=json-in-script&callback=showrecentcomments ></script><span id=rcw-cr><a href=http://helplogger.blogspot.com/2012/03/recent-comments-widget-for-blogger.html>Recent Comments Widget</a></span><style type=text/css> .rcw-comments a {text-transform: capitalize;} .rcw-comments {border-bottom: 1px dotted; padding-top: 7px!important; padding-bottom: 7px!important;} #rcw-cr {font-family: Arial,Tahoma;font-size:9px;padding-top:7px;display:block;} </style>

Step 4. Replace your-blog-name with your blog url.

Step 5. Click Save and you're done.

Hope you'll enjoy it!
Read more ...


Poll