Showing posts with label Widgets. Show all posts

Sunday, 22 December 2013

How to Create a Sitemap or Table of Contents in Blogger

One of the limitations of a blog is that it doesn't have an index or sitemap of the site that could make it easier for readers to find content that they are searching for.
While the blog archive and labels have all the information about the published post, these do not appear on a single page completely, so searching for more posts is not always easy.

Luckily, this gadget will help you to add a table of contents or sitemap on Blogger showing the index of all posts separated by categories that have been published. It will also show the latest posts with a text saying New!

table of contents, sitemap, blogger

Demo: You can see it working by clicking here.

How To Add a Sitemap with a List of Posts to Blogger


To implement it on your blog, follow the steps below:

Step 1. Login to your Blogger Dashboard and select your blog
Step 2. Go to Pages > click the New Page button and select Blank page


Step 3.  Click on the HTML tab and paste the following code inside the empty box:
<style>
p.labels a{color: #242424; text-transform: uppercase;font-size: 15px;}
a.post-titles {color: #0000FF;}
ol li{list-style-type:decimal;line-height:25px;}
</style>
<script>
//<![CDATA[
var postTitle=new Array();var postUrl=new Array();var postPublished=new Array();var postDate=new Array();var postLabels=new Array();var postRecent=new Array();var sortBy="titleasc";var tocLoaded=false;var numChars=250;var postFilter="";var numberfeed=0;function bloggersitemap(a){function b(){if("entry" in a.feed){var d=a.feed.entry.length;numberfeed=d;ii=0;for(var h=0;h<d;h++){var n=a.feed.entry[h];var e=n.title.$t;var m=n.published.$t.substring(0,10);var j;for(var g=0;g<n.link.length;g++){if(n.link[g].rel=="alternate"){j=n.link[g].href;break}}var o="";for(var g=0;g<n.link.length;g++){if(n.link[g].rel=="enclosure"){o=n.link[g].href;break}}var c="";if("category" in n){for(var g=0;g<n.category.length;g++){c=n.category[g].term;var f=c.lastIndexOf(";");if(f!=-1){c=c.substring(0,f)}postLabels[ii]=c;postTitle[ii]=e;postDate[ii]=m;postUrl[ii]=j;postPublished[ii]=o;if(h<10){postRecent[ii]=true}else{postRecent[ii]=false}ii=ii+1}}}}}b();sortBy="titleasc";sortPosts(sortBy);sortlabel();tocLoaded=true;displayToc2();document.write('</br><div class="sitemap-link"><a href="http://helplogger.blogspot.com/2013/12/add-sitemap-table-of-contents-to-blogger.html" style="font-size: 10px; text-decoration:none; color: #5146CD;">Get This Widget</a></div>')}function filterPosts(a){scroll(0,0);postFilter=a;displayToc(postFilter)}function allPosts(){sortlabel();postFilter="";displayToc(postFilter)}function sortPosts(d){function c(e,g){var f=postTitle[e];postTitle[e]=postTitle[g];postTitle[g]=f;var f=postDate[e];postDate[e]=postDate[g];postDate[g]=f;var f=postUrl[e];postUrl[e]=postUrl[g];postUrl[g]=f;var f=postLabels[e];postLabels[e]=postLabels[g];postLabels[g]=f;var f=postPublished[e];postPublished[e]=postPublished[g];postPublished[g]=f;var f=postRecent[e];postRecent[e]=postRecent[g];postRecent[g]=f}for(var b=0;b<postTitle.length-1;b++){for(var a=b+1;a<postTitle.length;a++){if(d=="titleasc"){if(postTitle[b]>postTitle[a]){c(b,a)}}if(d=="titledesc"){if(postTitle[b]<postTitle[a]){c(b,a)}}if(d=="dateoldest"){if(postDate[b]>postDate[a]){c(b,a)}}if(d=="datenewest"){if(postDate[b]<postDate[a]){c(b,a)}}if(d=="orderlabel"){if(postLabels[b]>postLabels[a]){c(b,a)}}}}}function sortlabel(){sortBy="orderlabel";sortPosts(sortBy);var a=0;var b=0;while(b<postTitle.length){temp1=postLabels[b];firsti=a;do{a=a+1}while(postLabels[a]==temp1);b=a;sortPosts2(firsti,a);if(b>postTitle.length){break}}}function sortPosts2(d,c){function e(f,h){var g=postTitle[f];postTitle[f]=postTitle[h];postTitle[h]=g;var g=postDate[f];postDate[f]=postDate[h];postDate[h]=g;var g=postUrl[f];postUrl[f]=postUrl[h];postUrl[h]=g;var g=postLabels[f];postLabels[f]=postLabels[h];postLabels[h]=g;var g=postPublished[f];postPublished[f]=postPublished[h];postPublished[h]=g;var g=postRecent[f];postRecent[f]=postRecent[h];postRecent[h]=g}for(var b=d;b<c-1;b++){for(var a=b+1;a<c;a++){if(postTitle[b]>postTitle[a]){e(b,a)}}}}function displayToc(a){var l=0;var h="";var e="Post Title";var m="Click to sort by title";var d="Date";var k="Click to sort by date";var c="Category";var j="";if(sortBy=="titleasc"){m+=" (descending)";k+=" (newest first)"}if(sortBy=="titledesc"){m+=" (ascending)";k+=" (newest first)"}if(sortBy=="dateoldest"){m+=" (ascending)";k+=" (newest first)"}if(sortBy=="datenewest"){m+=" (ascending)";k+=" (oldest first)"}if(postFilter!=""){j="Click to view all"}h+="<table>";h+="<tr>";h+='<td class="header1">';h+='<a href="javascript:toggleTitleSort();" title="'+m+'">'+e+"</a>";h+="</td>";h+='<td class="header2">';h+='<a href="javascript:toggleDateSort();" title="'+k+'">'+d+"</a>";h+="</td>";h+='<td class="header3">';h+='<a href="javascript:allPosts();" title="'+j+'">'+c+"</a>";h+="</td>";h+='<td class="header4">';h+="Read all";h+="</td>";h+="</tr>";for(var g=0;g<postTitle.length;g++){if(a==""){h+='<tr><td class="entry1"><a href="'+postUrl[g]+'">'+postTitle[g]+'</a></td><td class="entry2">'+postDate[g]+'</td><td class="entry3">'+postLabels[g]+'</td><td class="entry4"><a href="'+postPublished[g]+'">Read</a></td></tr>';l++}else{z=postLabels[g].lastIndexOf(a);if(z!=-1){h+='<tr><td class="entry1"><a href="'+postUrl[g]+'">'+postTitle[g]+'</a></td><td class="entry2">'+postDate[g]+'</td><td class="entry3">'+postLabels[g]+'</td><td class="entry4"><a href="'+postPublished[g]+'">Read</a></td></tr>';l++}}}h+="</table>";if(l==postTitle.length){var f='<span class="toc-note">Show All '+postTitle.length+" Posts<br/></span>"}else{var f='<span class="toc-note">Show '+l+" posts by category '";f+=postFilter+"' the "+postTitle.length+" Total Posts<br/></span>"}var b=document.getElementById("toc");b.innerHTML=f+h}function displayToc2(){var a=0;var b=0;while(b<postTitle.length){temp1=postLabels[b];document.write("<p/>");document.write('<p class="labels"><a href="/search/label/'+temp1+'">'+temp1+"</a></p><ol>");firsti=a;do{document.write("<li>");document.write('<a class="post-titles" href="'+postUrl[a]+'">'+postTitle[a]+"</a>");if(postRecent[a]==true){document.write(' - <strong><span style="color: rgb(255, 0, 0);">New!</span></strong>')}document.write("</li>");a=a+1}while(postLabels[a]==temp1);b=a;document.write("</ol>");sortPosts2(firsti,a);if(b>postTitle.length){break}}}function toggleTitleSort(){if(sortBy=="titleasc"){sortBy="titledesc"}else{sortBy="titleasc"}sortPosts(sortBy);displayToc(postFilter)}function toggleDateSort(){if(sortBy=="datenewest"){sortBy="dateoldest"}else{sortBy="datenewest"}sortPosts(sortBy);displayToc(postFilter)}function showToc(){if(tocLoaded){displayToc(postFilter);var a=document.getElementById("toclink")}else{alert("Just wait... TOC is loading")}}function hideToc(){var a=document.getElementById("toc");a.innerHTML="";var b=document.getElementById("toclink");b.innerHTML='<a href="#" onclick="scroll(0,0); showToc(); Effect.toggle(\'toc-result\',\'blind\');">?? Display Table of Contents</a> <img src="https://blogger.googleusercontent.com/img/b/R29vZ2xl/AVvXsEiCtLRPi7gDuOeHC-ZH3r5OQSaeirZJRmghZRm6ySU7mxL8Z4kWw30LEW2fXuOZN7Qzag-Vw_nmQmoFCoE4jzVWZCt0OIBsw3GQ82ski_MOpJos3ScG7cRkMxq9efkKaokXoTGvxwS6RfoO/s1600/new_icon.gif"/>'}function looptemp2(){for(var a=0;a<numberfeed;a++){document.write("<br>");document.write('Post Link : <a href="'+postUrl[a]+'">'+postTitle[a]+"</a><br>");document.write('Read all : <a href="'+postPublished[a]+'">'+postTitle[a]+"</a><br>");document.write("<br>")}};
//]]>
</script>
<script src="http://helplogger.blogspot.com/feeds/posts/default?max-results=9999&amp;alt=json-in-script&amp;callback=bloggersitemap"></script>
After adding the above code, replace http://helplogger.blogspot.com with the address of your blog.

Customization:

- to change the color and font size of categories title, replace the values in red
- to change the color of the links, replace the value in green

Step 4. Click Options on the right side and select Don't allow (hide existing) for the reader's comments

Step 5. Finally, click the Publish button and View the page.

That's all!

The index of the posts is sorted alphabetically and is updated automatically each time a new post is published.
Read more ...


Tuesday, 19 November 2013

Recent Rotating Post Gadget with Excerpt For Blogger

This Javascript code will display the latest posts of any feed with the distinction of having two parts that can be used individually or combined. At the top this widget will show a single post along with the title (link), author, date and a brief summary of its content. In addition, this post will rotate automatically within a list whose number of elements will be decided by us. At the bottom, we'll find a full list with chosen posts that will change the post above when we mouse over them, thus breaking the automatic cycle.

recent posts widget for blogger
Before installing anything, let's see it in action to decide if it does what we want.


Loading...

How to Add Recent Rotating Posts Widget to Blogger


Step 1. Go to Layout > click on Add a Gadget link.


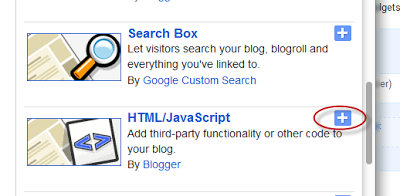
Step 2. From the pop-up windows, choose the HTML/Javascript gadget


Step 3. Paste this code inside the empty box:
<style>
.gfg-root {
width: 100%;
height : auto;
position : relative;
overflow : hidden;
margin: 0 auto;
text-align : center;
font-size: 12px;
border: 1px solid #DBDBDB;
}
.gfg-title {
font-size: 16px;
font-weight : bold;
color : #8A8985;
background:#DBDBDB;
background-repeat: repeat;
line-height : 1.4em;
overflow : hidden;
white-space : nowrap;
padding: 5px;
text-shadow: 0px 2px #fff;
}
.gfg-entry {
background-color: #FFFFFF;
width : 100%;
height : 9.2em;
position : relative;
overflow : hidden;
text-align : left;
margin-top : 3px;
}
.gf-title a {
font-weight: bold;
color: #8B8A86;
font-size: 14px;
}
.gfg-subtitle {
display: none;
}
.gfg-list {
position : relative;
overflow : hidden;
text-align : left;
}
.gfg-listentry {
line-height : 1.5em;
overflow : hidden;
white-space : nowrap;
text-overflow : ellipsis;
padding-left : 15px;
padding-right : 5px;
}
.gfg-listentry-odd {
background-color : #F3F3F3;
border-bottom : 1px dotted #CCCCCC;
padding: 5px;
}
.gfg-listentry-even {
background-color : #F3F3F3;
border-bottom : 1px dotted #CCCCCC;
padding: 5px;
}
.gfg-listentry-odd a{
color: #595959;
padding: 0 0px 0 10px;
}
.gfg-listentry-even a{
color: #242424;
padding: 0 0px 0 10px;
}
.gfg-listentry-highlight {
background: #ffffff;
}
.gfg-listentry-highlight:before {
position: absolute;
left: 0;
content: '\25BA ';
font-size: 14px;
color: #DBDBDB;
}
.gfg-listentry-highlight a {
color: #242424;
}
.gfg-root .gfg-entry .gf-result {
position : relative;
background-color: #ffffff;
width : auto;
height : 100%;
padding-left : 20px;
padding-right : 5px;
}
.gfg-root .gfg-entry .gf-result .gf-title {
font-size: 14px;
line-height : 1.2em;
overflow : hidden;
white-space : nowrap;
text-overflow : ellipsis;
margin-bottom : 2px;
margin-top: 5px;
}
.gfg-root .gfg-entry .gf-result .gf-snippet {
height : 3.8em;
color: #000000;
margin-top : 3px;
}
.clearFloat {
clear : both;
}</style>
<script src="http://www.google.com/jsapi" type="text/javascript"></script><script src="http://www.google.com/uds/solutions/dynamicfeed/gfdynamicfeedcontrol.js" type="text/javascript"></script>
<script type="text/javascript">
function showGadget() {var feeds = [{title:'List',url:'http://helplogger.blogspot.com/feeds/posts/default?redirect=false&start-index=1&max-results=10'},];
new GFdynamicFeedControl(feeds, 'feedGadget',{title: 'Latest Posts', numResults : 10, displayTime : 5000, hoverTime : 500});} google.load("feeds", "1");
google.setOnLoadCallback(showGadget);
</script>
<div id="feedGadget">Loading...</div>

Customizations:

The url in blue is the feed address. Obviously, the http://helplogger.blogspot.com address should be replaced with yours.

Next is start-index=1. This number indicates which post will appear first on the list. By default it is the latest post published on our blog, so if we want to begin displaying older posts, we need to change the 1 value.

max-results=10 indicates the maximum number of posts that we will be reading from the feed, beginning from the one that we have set up before in the start-index=1. This number always needs to be equal or greater to what we should see later and its purpose is to set the number of posts that will be shown in the gadget. The easy thing would be to put 500 in order not to fail, but the higher the number is, the longer the gadget will take to load, so it's better to adjust to what we need to show.

Finally here are some other parameters of the script:

title: 'Latest Posts', is the widget's title that appears on top.
numResults: 10, number of posts that will show in the list
displayTime: 5000, the delay time between posts in the rotator (in milliseconds)
hoverTime: 500, minimum time for an item in the list to be displayed at the top.

If you want to hide the list and show only the posts, then change this part:
.gfg-list {
position : relative;
overflow : hidden;
text-align : left;
}
 to :
.gfg-list {
display:none;
}
and if you want to display only the list, then change this part:
.gfg-entry {
background-color: #FFFFFF;
width : 100%;
height : 9.2em;
position : relative;
overflow : hidden;
text-align : left;
margin-top : 3px;
}
to:
.gfg-entry {
display: none; }

Step 4. Save the gadget and you're done. Enjoy!
Read more ...


Tuesday, 12 November 2013

Scriptaculous image slider/carousel for Blogger

Image galleries, sliders and slideshows have become increasingly popular within web pages and more and more developers have been creating these amazing powerful, versatile and sleek galleries. In this tutorial, I will show you how to display the relevant content in an attractive and usable manner, by adding this beautiful carousel slideshow made by Brian R. Miedlar which will display a gallery of images with a cool sliding effect.
image slider for blogger

blogger widgets, blogger slider

If you need to see this carousel in action, please visit this demo blog.

How to Add the Scriptaculous Image Slider on Blogger


Step 1. Log in to your Blogger Dashboard and select your blog

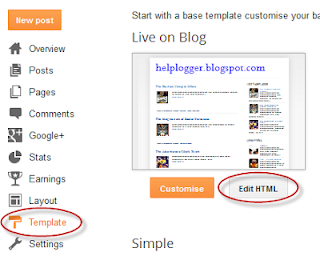
Step 2. Go to Template and click the Edit HTML button:


Step 3. Click anywhere on the code area and press the CTRL + F keys, then search this tag:
</head>

Step 4. Just above the </head> tag, add this code:
<script src='http://www.google.com/jsapi'></script>
<script>
google.load("prototype","1.7.0.0");
google.load("scriptaculous", "1.9.0");
</script>


<script language='javascript' src='http://helplogger.googlecode.com/svn/trunk/Image Carousel/os.js' type='text/javascript'/>
<script language='javascript' src='http://helplogger.googlecode.com/svn/trunk/Image Carousel/carousel.js' type='text/javascript'/>
<script language='javascript' src='http://helplogger.googlecode.com/svn/trunk/Image Carousel/application.js' type='text/javascript'/>
Note: If you already have Scriptaculous and Prototype, it's not necessary adding the code in red.

Step 5. Now search for the following code:
]]></b:skin>
Step 6. Just above it, add the code below:
.carousel {
position:relative;
clear:both;
left:20px; /* Distance from left */
margin-top:10px;
margin-bottom:20px;
border:2px solid #000; /* Carousel border */
background-color:#333333; /* Background color */
}
.carousel .navButton { cursor:pointer; display:block;
text-indent:-9999px;
background-repeat:none;
z-index:10;
}
.carousel .container {
position:absolute;
overflow:hidden;
}
.carousel .items {
position:absolute;  }
#Carousel2 {
height:88px; /* height of the container */
width:685px; /* width of the container */
}
#Carousel2 .container {
left:26px;
top:12px;
width:630px; /* width of the images container */
height:100px; /* height of the images container */
}
#Carousel2 .items { top:0; left:2px;
width:1700px; /* overall width of all the thumbnails */
}
#Carousel2 .item { height:70px; width:70px; float:left; clear:right; }
#Carousel2 .item .icon img { position:relative; left:0px; width:65px !important; height:65px; cursor:pointer;}
#Carousel2 .navButton { position:absolute; bottom:0px; width:24px; height:87px; }
#Carousel2 .navButton.previous { left:0px; background-image:url(https://blogger.googleusercontent.com/img/b/R29vZ2xl/AVvXsEjQaG51H8KXQxBVK7UDYcqZH6nARcdzDH4IAGRIV8mkRmULNweIk8Fu4SgD5jWIUarbZvlkYZsxHT7ZYCGJzxBaWout8h0VwO8wN9gFb11pCjNwYKwbTJr-EHf-nNDOXUrxTMm3OeUif1I/s1600/button-left.png); }
#Carousel2 .navButton.next { right:2px; background-image:url(https://blogger.googleusercontent.com/img/b/R29vZ2xl/AVvXsEjyEE6M5d8orhFngjxziC4yaIHyWSC3J81UlqBPV_inGqnnfXVores-1pHmGs71BQTPeWc4knHvT2OpSGg82Xx4mSAWdgwx4QuD_RLsMmlWiKu09U93o0GI90t_HceKn-x9iNok1iP3C3I/s1600/button-right.png); }
#Carousel2 .item .key { display:none;}
#Carousel2 .item .picture { display:none;}
Here, I have put some styles in green that can be customized as you want , such as the border color and the background color. The arrows are images, so if you want to change their color or use other pics, you have to change the two URLs in blue.

The width of the carousel is of 685px, so below the header might look good. If you want to change the length, then you need to change the /* width of the container */ (which is the size of the entire carousel), the /* width of the images container*/ (which is the area that shows the thumbnails) and the /* overall width of the thumbnails */ which is the actual width that all the thumbnails occupy.

Step 7. In order to save the changes, click the Save Template button

Step 8. Finally, go to Layout and click the Add a Gadget link, then choose HTML/Javascript from the pop-up box and paste the structure of the carousel inside the empty box:
<div id="Carousel2" class="carousel">
<div class="button navButton previous" style="display:none;">Back</div>
<div class="button navButton next" style="display:none;">Forward</div>
<div class="container">
<div class="items">

<div class="item">
<div class="key caption">Thumb</div>
<div class="icon">
<a href="link URL"><img width="65" height="65" src="image URL" /></a></div>
<div class="picture"></div>
</div>

<div class="item">
<div class="key caption">Thumb</div>
<div class="icon">
<a href="link URL"><img width="65" height="65" src="image URL" /></a></div>
<div class="picture"></div>
</div>

<div class="item">
<div class="key caption">Thumb</div>
<div class="icon">
<a href="link URL"><img width="65" height="65" src="image URL" /></a></div>
<div class="picture"></div>
</div>

<div class="item">
<div class="key caption">Thumb</div>
<div class="icon">
<a href="link URL"><img width="65" height="65" src="image URL" /></a></div>
<div class="picture"></div>
</div>

<div class="item">
<div class="key caption">Thumb</div>
<div class="icon">
<a href="link URL"><img width="65" height="65" src="image URL" /></a></div>
<div class="picture"></div>
</div>

<div class="item">
<div class="key caption">Thumb</div>
<div class="icon">
<a href="link URL"><img width="65" height="65" src="image URL" /></a></div>
<div class="picture"></div>
</div>

<div class="item">
<div class="key caption">Thumb</div>
<div class="icon">
<a href="link URL"><img width="65" height="65" src="image URL" /></a></div>
<div class="picture"></div>
</div>

<div class="item">
<div class="key caption">Thumb</div>
<div class="icon">
<a href="link URL"><img width="65" height="65" src="image URL" /></a></div>
<div class="picture"></div>
</div>

<div class="item">
<div class="key caption">Thumb</div>
<div class="icon">
<a href="link URL"><img width="65" height="65" src="image URL" /></a></div>
<div class="picture"></div>
</div>

<div class="item">
<div class="key caption">Thumb</div>
<div class="icon">
<a href="link URL"><img width="65" height="65" src="image URL" /></a></div>
<div class="picture"></div>
</div>

<div class="item">
<div class="key caption">Thumb</div>
<div class="icon">
<a href="link URL"><img width="65" height="65" src="image URL" /></a></div>
<div class="picture"></div>
</div>

<div class="item">
<div class="key caption">Thumb</div>
<div class="icon">
<a href="link URL"><img width="65" height="65" src="image URL" /></a></div>
<div class="picture"></div>
</div>

<div class="item">
<div class="key caption">Thumb</div>
<div class="icon">
<a href="link URL"><img width="65" height="65" src="image URL" /></a></div>
<div class="picture"></div>
</div>

<div class="item">
<div class="key caption">Thumb</div>
<div class="icon">
<a href="link URL"><img width="65" height="65" src="image URL" /></a></div>
<div class="picture"></div>
</div>

<div class="item">
<div class="key caption">Thumb</div>
<div class="icon">
<a href="link URL"><img width="65" height="65" src="image URL" /></a></div>
<div class="picture"></div>
</div>

<div class="item">
<div class="key caption">Thumb</div>
<div class="icon">
<a href="link URL"><img width="65" height="65" src="image URL" /></a></div>
<div class="picture"></div>
</div>

<div class="item">
<div class="key caption">Thumb</div>
<div class="icon">
<a href="link URL"><img width="65" height="65" src="image URL" /></a></div>
<div class="picture"></div>
</div>

<div class="item">
<div class="key caption">Thumb</div>
<div class="icon">
<a href="link URL"><img width="65" height="65" src="image URL" /></a></div>
<div class="picture"></div>
</div>

<div class="item">
<div class="key caption">Thumb</div>
<div class="icon">
<a href="link URL"><img width="65" height="65" src="image URL" /></a></div>
<div class="picture"></div>
</div>

</div>
</div>
</div>
Add the links and images addresses. The link URL is optional, so you can add the addresses only when if you want to link the images to some posts.

If you add more images or remove some, you need also to change the width of the thumbnails, otherwise some pictures will appear behind the others.

If you want to add more pictures, just add before the </div> tag, a piece of code like this:
<div class="item">
<div class="key caption">Thumb</div>
<div class="icon">
<a href="link URL"><img width="65" height="65" src="image URL" /></a></div>
<div class="picture"></div>
</div>
And in case you want to align the gadget, just change the part from Distance from the left to another value.
Read more ...


Tuesday, 22 October 2013

How to Add a Recent Forum Topics Widget to Blogger

If you are using the Nabble forum in your blog is very likely that this gadget will interest you because, as the title suggests, it will display the lastest topics that have been published in your forum in a very similar manner to the recent comments gadget that works with the blog's feed.

nabble forum
If you want to add a list with the Recent Forum Topics then follow the steps below:

Go to your forum and look at the bottom where it says Feeds, click on that link and then two links of the Feed will appear (the first being the Topics only Feed and the other one is Topics and replies) - choose the one you want.
using nabble feeds to see latest forum topics

After this, log in to your Blogger Dashboard, go to Layout, click on Add a Gadget link, choose Feed from the gadgets list and paste the Feed URL you have selected inside the text box.

configure gadget feed in blogger

Click on Continue, and you only have to configure the parameters, then Save changes to see the results.

That's it! Enjoy :)
Read more ...


Add a forum on your Blogger blog with Nabble

Forum is a platform where visitors can interact with each other and discuss different hot topics. There you can add desired topics for getting comments and diverse suggestions on them. If you have a good traffic, then you can place questions on daily basis for the potential visitors to answer, thus your forum simultaneously converts itself into a huge frequently asked quesions section "FAQ". Forums will provide your visitors an open social atmosphere to express their useful ideas and share other's ideas.

In this brief tutorial, I have explained simple steps to add a forum to your Blogger or blogspot blog. So let's get started!

blogger forum, blogspot nabble forum

How to Create a Forum With Nabble


To implement a forum we will use Nabble, in my opinion, one of the best free options. We go to Nabble page and there, we will create an account (keep in mind that this account will be the moderator of the forum).

And once we have everything set (it also has a wide variety of customizing options), go to Options -> Application -> Change appearance:

nabble change appearance

There, we can also edit the CSS of the forum and other things...

Now we have to give the structure of a real forum, i.e. organizing it by categories. To do this click on the Options menu, select Application, then click Change application type:

nabble option change application type

Then choose the Forum category and save your changes.

To finish, we only have to create categories and for this go back to Options, this time select Structure and then choose Create a new sub-forum:
nabble create new sub-forum

Fill in the details of the category and that's it, you will have your forum running.

The rest are small details, like sort categories (Options > Structure > Manage sub-forums), customize your avatar and your signature (YourNickname > Account Settings), change permissions (Options > Users > Permissions), etc.

Now for integrating the newly created forum to your blog, you must go to Options - Embedding options and copy the javascript code.
nabble forum embedding options

Embed the forum in a Blogger page


Login to your Blogger Dashboard, select your blog, click the Pages link on the left sidebar and create a new Blank Page


Once there, get in the HTML mode.


Paste inside the empty box the code that we copied earlier, and if everything went well, we should see our brand new forum for our blog!

create a forum for blogger with nabble

I hope this tutorial was helpful to you and you will begin using this great service.
Read more ...


Monday, 21 October 2013

Top Commentators Widget with Avatars for Blogger

The commentators are a fundamental part of any blog, since they are the ones that give life to the blog, opening and replying to discussions which leads to more activity in the posts.
how to add top commenters widget to blogger

It is therefore very important to know which are the most active users of your blog, the users who leave more comments, and for this reason, today I present a great method to display a list with the top commentators.

The gadget will look something like this:

add top commentators widget to blogger

This Top Commentators gadget comes with user's avatar and is done with JavaScript.

How to Add the Top Commenters Gadget to Blogger


1. To add this gadget, you have to go to Layout, click on Add a Gadget link.

2. Select the HTML/JavaScript gadget and copy/paste within the empty box the following code:

<style type="text/css">
.top-commentators {
margin: 3px 0;
border-bottom: 1px dotted #ccc;
}
.avatar-top-commentators {
vertical-align:middle;
border-radius: 30px;
}
.top-commentators .commenter-link-name {
padding-left:0;
}
</style>
<script type="text/javascript">
var maxTopCommenters = 8;  
var minComments = 1;       
var numDays = 0;           
var excludeMe = true;      
var excludeUsers = ["Anonymous", "someotherusertoexclude"];   
var maxUserNameLength = 42;
//
var txtTopLine = '<b>[#].</b> [image] [user] ([count])';
var txtNoTopCommenters = 'No top commentators at this time.';
var txtAnonymous = '';
//
var sizeAvatar = 33;
var cropAvatar = true;
//
var urlNoAvatar = "https://blogger.googleusercontent.com/img/b/R29vZ2xl/AVvXsEj343Y1KpS0Ut2Nu5Jbo70U-qh2fYwrH-aB_B8iIoZ21uJvtvrufVbwAA9f6DwLUd592vS4pO119BucsqNi0I6y4iIv_ZomBTJUHkPtP8G_SOGuopoymmJkeLfuFxecE58b6Qnop0HKRZcN/s1600/avatar_blue_m_96.png" + sizeAvatar;
var urlAnoAvatar = 'https://blogger.googleusercontent.com/img/b/R29vZ2xl/AVvXsEheQWwlUdbtiYnYDqitLkcOLwjamfr8_ayo9f8gA46msf4rgov9ypgRsxVyG3d6AxaZyOTwWEWdfJNMm5OqugZ2lI8Libq63KPsn1ZZyJlO_MrKDOrB-NBhcJts4eRmLKevq54nWst5bnRA/s1600/avatar1.png' + sizeAvatar;
var urlMyProfile = '';
var urlMyAvatar = '';

if(!Array.indexOf) {
 Array.prototype.indexOf=function(obj) {
  for(var i=0;i<this.length;i++) if(this[i]==obj) return i;
  return -1;
}}
function replaceTopCmtVars(text, item, position)
{
  if(!item || !item.author) return text;
  var author = item.author;

  var authorUri = "";
  if(author.uri && author.uri.$t != "")
    authorUri = author.uri.$t;

  var avaimg = urlAnoAvatar;
  var bloggerprofile = "http://www.blogger.com/profile/";
  if(author.gd$image && author.gd$image.src && authorUri.substr(0,bloggerprofile.length) == bloggerprofile)
    avaimg = author.gd$image.src;
  else {
    var parseurl = document.createElement('a');
    if(authorUri != "") {
      parseurl.href = authorUri;
      avaimg = 'http://www.google.com/s2/favicons?domain=' + parseurl.hostname;
    }
  }
  if(urlMyProfile != "" && authorUri == urlMyProfile && urlMyAvatar != "")
    avaimg = urlMyAvatar;
  if(avaimg == "http://img2.blogblog.com/img/b16-rounded.gif" && urlNoAvatar != "")
    avaimg = urlNoAvatar;
  var newsize="s"+sizeAvatar;
  avaimg = avaimg.replace(/\/s\d\d+-c\//, "/"+newsize+"-c/");
  if(cropAvatar) newsize+="-c";
  avaimg = avaimg.replace(/\/s\d\d+(-c){0,1}\//, "/"+newsize+"/");

  var authorName = author.name.$t;
  if(authorName == 'Anonymous' && txtAnonymous != '' && avaimg == urlAnoAvatar)
    authorName = txtAnonymous;
  var imgcode = '<img class="avatar-top-commentators" height="'+sizeAvatar+'" width="'+sizeAvatar+'" title="'+authorName+'" src="'+avaimg+'" />';
  if(authorUri!="") imgcode = '<a href="'+authorUri+'">'+imgcode+'</a>';

  if(maxUserNameLength > 3 && authorName.length > maxUserNameLength)
    authorName = authorName.substr(0, maxUserNameLength-3) + "...";
  var authorcode = authorName;
  if(authorUri!="") authorcode = '<a class="commenter-link-name" href="'+authorUri+'">'+authorcode+'</a>';

  text = text.replace('[user]', authorcode);
  text = text.replace('[image]', imgcode);
  text = text.replace('[#]', position);
  text = text.replace('[count]', item.count);
  return text;
}

var topcommenters = {};
var ndxbase = 1;
function showTopCommenters(json) {
  var one_day=1000*60*60*24;
  var today = new Date();

  if(urlMyProfile == "") {
    var elements = document.getElementsByTagName("*");
    var expr = /(^| )profile-link( |$)/;
    for(var i=0 ; i<elements.length ; i++)
      if(expr.test(elements[i].className)) {
        urlMyProfile = elements[i].href;
        break;
      }
  }

  if(json && json.feed && json.feed.entry && json.feed.entry.length) for(var i = 0 ; i < json.feed.entry.length ; i++ ) {
    var entry = json.feed.entry[i];
    if(numDays > 0) {
      var datePart = entry.published.$t.match(/\d+/g);
      var cmtDate = new Date(datePart[0],datePart[1]-1,datePart[2],datePart[3],datePart[4],datePart[5]);
     
      var days = Math.ceil((today.getTime()-cmtDate.getTime())/(one_day));
      if(days > numDays) break;
    }
    var authorUri = "";
    if(entry.author[0].uri && entry.author[0].uri.$t != "")
      authorUri = entry.author[0].uri.$t;

    if(excludeMe && authorUri != "" && authorUri == urlMyProfile)
      continue;
    var authorName = entry.author[0].name.$t;
    if(excludeUsers.indexOf(authorName) != -1)
      continue;

    var hash=entry.author[0].name.$t + "-" + authorUri;
    if(topcommenters[hash])
      topcommenters[hash].count++;
    else {
      var commenter = new Object();
      commenter.author = entry.author[0];
      commenter.count = 1;
      topcommenters[hash] = commenter;
    }
  }
  if(json && json.feed && json.feed.entry && json.feed.entry.length && json.feed.entry.length == 200) {
    ndxbase += 200;
    document.write('<script type="text/javascript" src="http://'+window.location.hostname+'/feeds/comments/default?redirect=false&max-results=200&start-index='+ndxbase+'&alt=json-in-script&callback=showTopCommenters"></'+'script>');
    return;
  }

  // convert object to array of tuples
  var tuplear = [];
  for(var key in topcommenters) tuplear.push([key, topcommenters[key]]);

  tuplear.sort(function(a, b) {
    if(b[1].count-a[1].count)
        return b[1].count-a[1].count;
    return (a[1].author.name.$t.toLowerCase() < b[1].author.name.$t.toLowerCase()) ? -1 : 1;
  });

  var realcount = 0;
  for(var i = 0; i < maxTopCommenters && i < tuplear.length ; i++) {
    var item = tuplear[i][1];
    if(item.count < minComments)
        break;
    document.write('<di'+'v class="top-commentators">');
    document.write(replaceTopCmtVars(txtTopLine, item, realcount+1));
    document.write('</d'+'iv>');
    realcount++;
  }
  if(!realcount)
    document.write(txtNoTopCommenters);
}
document.write('<script type="text/javascript" src="http://'+window.location.hostname+'/feeds/comments/default?redirect=false&max-results=200&alt=json-in-script&callback=showTopCommenters"></'+'script>');
</script>

3. Now you just have to save changes and you're done!

Configuration


- To modify the number of users displayed in the gadget, look for var maxTopCommenters = 8; and change 8 with any number you want.
- To change the avatar size of the commenters, look for var sizeAvatar = 33; and change number 33 with the number of pixels you want.
Read more ...


Thursday, 26 September 2013

Customize the scroll bar (scrollbar) with JScrollPane

JScrollPane is a jQuery script that allows you to change the blog' scroll bar, ie the browser scrollbar.
Although we can use CSS to change it, the problem is that is not standardized, because with CSS we can make it work only in Chrome and Safari; and in the case of Internet Explorer it also has its own code but obviously it only works in that browser (I don't know which versions). So what we will do then is to give a new look to the scrollbar but by using jQuery, so the change will be visible in all browsers.


Demo

You can see an example in this test blog where the scroll bar has a different shape and color.

How to change the scrollbar on Blogger


1. Go to Template > Edit HTML and before </head> paste this code:
<script src='//ajax.googleapis.com/ajax/libs/jquery/1.10.2/jquery.min.js' type='text/javascript'/>

<style>
.jspContainer {overflow: hidden;position: relative;}.jspPane {position: absolute;}
.jspVerticalBar {position: absolute;top: 0;right: 0;width: 16px;height: 100%;background: #ccc;}
.jspHorizontalBar {position: absolute;bottom: 0;left: 0;width: 100%;height: 16px;background: #ccc;}
.jspVerticalBar *,.jspHorizontalBar * {margin: 0;padding: 0;}
.jspCap {display: none;}.jspHorizontalBar .jspCap {float: left;}

.jspTrack {
background: #fff; /* background color of the bar */
position: relative;
}
.jspDrag {
background: #CC0000; /* Color of the scrollbar */
position: relative;
top: 0;
left: 0;
cursor: pointer;
}
.jspHorizontalBar .jspTrack,
.jspHorizontalBar .jspDrag {
float: left;
height: 100%;
}
.jspArrow {
background: #888; /* The color of the scrollbar limits */
text-indent: -20000px;
display: block;
cursor: pointer;
}
.jspArrow.jspDisabled {
cursor: default;
background: #333; /* Color of the limits when the srollbar is reaching them */
}
.jspVerticalBar .jspArrow {
height: 16px;
}
.jspHorizontalBar .jspArrow {
width: 16px;
float: left;
height: 100%;
}
.jspVerticalBar .jspArrow:focus {outline: none;}.jspCorner {background: #eeeef4;float: left;height: 100%;}* html .jspCorner {margin: 0 -3px 0 0;}
html, body {
height: 100%;
margin: 0;
padding: 0;
}
#blog-container {
height: 100%;
margin: 0;
padding: 0;
overflow: auto;
}
</style>
<script>
//<![CDATA[
/*! Copyright (c) 2013 Brandon Aaron (http://brandonaaron.net)
* Licensed under the MIT License (LICENSE.txt).
* Version: 3.1.3
*/

(function (factory) {
if ( typeof define === 'function' && define.amd ) {
define(['jquery'], factory);
} else if (typeof exports === 'object') {
module.exports = factory;
} else {
// Browser globals
factory(jQuery);
}
}(function ($) {

var toFix = ['wheel', 'mousewheel', 'DOMMouseScroll', 'MozMousePixelScroll'];
var toBind = 'onwheel' in document || document.documentMode >= 9 ? ['wheel'] : ['mousewheel', 'DomMouseScroll', 'MozMousePixelScroll'];
var lowestDelta, lowestDeltaXY;

if ( $.event.fixHooks ) {
for ( var i = toFix.length; i; ) {
$.event.fixHooks[ toFix[--i] ] = $.event.mouseHooks;
}
}

$.event.special.mousewheel = {
setup: function() {
if ( this.addEventListener ) {
for ( var i = toBind.length; i; ) {
this.addEventListener( toBind[--i], handler, false );
}
} else {
this.onmousewheel = handler;
}
},

teardown: function() {
if ( this.removeEventListener ) {
for ( var i = toBind.length; i; ) {
this.removeEventListener( toBind[--i], handler, false );
}
} else {
this.onmousewheel = null;
}
}
};

$.fn.extend({
mousewheel: function(fn) {
return fn ? this.bind("mousewheel", fn) : this.trigger("mousewheel");
},

unmousewheel: function(fn) {
return this.unbind("mousewheel", fn);
}
});

function handler(event) {
var orgEvent = event || window.event,
args = [].slice.call(arguments, 1),
delta = 0,
deltaX = 0,
deltaY = 0,
absDelta = 0,
absDeltaXY = 0,
fn;
event = $.event.fix(orgEvent);
event.type = "mousewheel";
if ( orgEvent.wheelDelta ) { delta = orgEvent.wheelDelta; }
if ( orgEvent.detail ) { delta = orgEvent.detail * -1; }
if ( orgEvent.deltaY ) {
deltaY = orgEvent.deltaY * -1;
delta = deltaY;
}
if ( orgEvent.deltaX ) {
deltaX = orgEvent.deltaX;
delta = deltaX * -1;
}
if ( orgEvent.wheelDeltaY !== undefined ) { deltaY = orgEvent.wheelDeltaY; }
if ( orgEvent.wheelDeltaX !== undefined ) { deltaX = orgEvent.wheelDeltaX * -1; }
absDelta = Math.abs(delta);
if ( !lowestDelta || absDelta < lowestDelta ) { lowestDelta = absDelta; }
absDeltaXY = Math.max(Math.abs(deltaY), Math.abs(deltaX));
if ( !lowestDeltaXY || absDeltaXY < lowestDeltaXY ) { lowestDeltaXY = absDeltaXY; }
fn = delta > 0 ? 'floor' : 'ceil';
delta = Math[fn](delta / lowestDelta);
deltaX = Math[fn](deltaX / lowestDeltaXY);
deltaY = Math[fn](deltaY / lowestDeltaXY);
args.unshift(event, delta, deltaX, deltaY);
return ($.event.dispatch || $.event.handle).apply(this, args);
}
}));

/*
* jScrollPane - v2.0.0beta5 - 2010-09-18
* http://jscrollpane.kelvinluck.com/
* Copyright (c) 2010 Kelvin Luck
* Dual licensed under the MIT and GPL licenses.
*/
(function(b,a,c){b.fn.jScrollPane=function(f){function d(C,L){var au,N=this,V,ah,v,aj,Q,W,y,q,av,aB,ap,i,H,h,j,X,R,al,U,t,A,am,ac,ak,F,l,ao,at,x,aq,aE,g,aA,ag=true,M=true,aD=false,k=false,Z=b.fn.mwheelIntent?"mwheelIntent.jsp":"mousewheel.jsp";aE=C.css("paddingTop")+" "+C.css("paddingRight")+" "+C.css("paddingBottom")+" "+C.css("paddingLeft");g=(parseInt(C.css("paddingLeft"))||0)+(parseInt(C.css("paddingRight"))||0);an(L);function an(aH){var aL,aK,aJ,aG,aF,aI;au=aH;if(V==c){C.css({overflow:"hidden",padding:0});ah=C.innerWidth()+g;v=C.innerHeight();C.width(ah);V=b('<div class="jspPane" />').wrap(b('<div class="jspContainer" />').css({width:ah+"px",height:v+"px"}));C.wrapInner(V.parent());aj=C.find(">.jspContainer");V=aj.find(">.jspPane");V.css("padding",aE)}else{C.css("width",null);aI=C.outerWidth()+g!=ah||C.outerHeight()!=v;if(aI){ah=C.innerWidth()+g;v=C.innerHeight();aj.css({width:ah+"px",height:v+"px"})}aA=V.innerWidth();if(!aI&&V.outerWidth()==Q&&V.outerHeight()==W){if(aB||av){V.css("width",aA+"px");C.css("width",(aA+g)+"px")}return}V.css("width",null);C.css("width",(ah)+"px");aj.find(">.jspVerticalBar,>.jspHorizontalBar").remove().end()}aL=V.clone().css("position","absolute");aK=b('<div style="width:1px; position: relative;" />').append(aL);b("body").append(aK);Q=Math.max(V.outerWidth(),aL.outerWidth());aK.remove();W=V.outerHeight();y=Q/ah;q=W/v;av=q>1;aB=y>1;if(!(aB||av)){C.removeClass("jspScrollable");V.css({top:0,width:aj.width()-g});n();D();O();w();af()}else{C.addClass("jspScrollable");aJ=au.maintainPosition&&(H||X);if(aJ){aG=ay();aF=aw()}aC();z();E();if(aJ){K(aG);J(aF)}I();ad();if(au.enableKeyboardNavigation){P()}if(au.clickOnTrack){p()}B();if(au.hijackInternalLinks){m()}}if(au.autoReinitialise&&!aq){aq=setInterval(function(){an(au)},au.autoReinitialiseDelay)}else{if(!au.autoReinitialise&&aq){clearInterval(aq)}}C.trigger("jsp-initialised",[aB||av])}function aC(){if(av){aj.append(b('<div class="jspVerticalBar" />').append(b('<div class="jspCap jspCapTop" />'),b('<div class="jspTrack" />').append(b('<div class="jspDrag" />').append(b('<div class="jspDragTop" />'),b('<div class="jspDragBottom" />'))),b('<div class="jspCap jspCapBottom" />')));R=aj.find(">.jspVerticalBar");al=R.find(">.jspTrack");ap=al.find(">.jspDrag");if(au.showArrows){am=b('<a class="jspArrow jspArrowUp" />').bind("mousedown.jsp",az(0,-1)).bind("click.jsp",ax);ac=b('<a class="jspArrow jspArrowDown" />').bind("mousedown.jsp",az(0,1)).bind("click.jsp",ax);if(au.arrowScrollOnHover){am.bind("mouseover.jsp",az(0,-1,am));ac.bind("mouseover.jsp",az(0,1,ac))}ai(al,au.verticalArrowPositions,am,ac)}t=v;aj.find(">.jspVerticalBar>.jspCap:visible,>.jspVerticalBar>.jspArrow").each(function(){t-=b(this).outerHeight()});ap.hover(function(){ap.addClass("jspHover")},function(){ap.removeClass("jspHover")}).bind("mousedown.jsp",function(aF){b("html").bind("dragstart.jsp selectstart.jsp",function(){return false});ap.addClass("jspActive");var s=aF.pageY-ap.position().top;b("html").bind("mousemove.jsp",function(aG){S(aG.pageY-s,false)}).bind("mouseup.jsp mouseleave.jsp",ar);return false});o()}}function o(){al.height(t+"px");H=0;U=au.verticalGutter+al.outerWidth();V.width(ah-U-g);if(R.position().left==0){V.css("margin-left",U+"px")}}function z(){if(aB){aj.append(b('<div class="jspHorizontalBar" />').append(b('<div class="jspCap jspCapLeft" />'),b('<div class="jspTrack" />').append(b('<div class="jspDrag" />').append(b('<div class="jspDragLeft" />'),b('<div class="jspDragRight" />'))),b('<div class="jspCap jspCapRight" />')));ak=aj.find(">.jspHorizontalBar");F=ak.find(">.jspTrack");h=F.find(">.jspDrag");if(au.showArrows){at=b('<a class="jspArrow jspArrowLeft" />').bind("mousedown.jsp",az(-1,0)).bind("click.jsp",ax);x=b('<a class="jspArrow jspArrowRight" />').bind("mousedown.jsp",az(1,0)).bind("click.jsp",ax);
if(au.arrowScrollOnHover){at.bind("mouseover.jsp",az(-1,0,at));x.bind("mouseover.jsp",az(1,0,x))}ai(F,au.horizontalArrowPositions,at,x)}h.hover(function(){h.addClass("jspHover")},function(){h.removeClass("jspHover")}).bind("mousedown.jsp",function(aF){b("html").bind("dragstart.jsp selectstart.jsp",function(){return false});h.addClass("jspActive");var s=aF.pageX-h.position().left;b("html").bind("mousemove.jsp",function(aG){T(aG.pageX-s,false)}).bind("mouseup.jsp mouseleave.jsp",ar);return false});l=aj.innerWidth();ae()}else{}}function ae(){aj.find(">.jspHorizontalBar>.jspCap:visible,>.jspHorizontalBar>.jspArrow").each(function(){l-=b(this).outerWidth()});F.width(l+"px");X=0}function E(){if(aB&&av){var aF=F.outerHeight(),s=al.outerWidth();t-=aF;b(ak).find(">.jspCap:visible,>.jspArrow").each(function(){l+=b(this).outerWidth()});l-=s;v-=s;ah-=aF;F.parent().append(b('<div class="jspCorner" />').css("width",aF+"px"));o();ae()}if(aB){V.width((aj.outerWidth()-g)+"px")}W=V.outerHeight();q=W/v;if(aB){ao=1/y*l;if(ao>au.horizontalDragMaxWidth){ao=au.horizontalDragMaxWidth}else{if(ao<au.horizontalDragMinWidth){ao=au.horizontalDragMinWidth}}h.width(ao+"px");j=l-ao;ab(X)}if(av){A=1/q*t;if(A>au.verticalDragMaxHeight){A=au.verticalDragMaxHeight}else{if(A<au.verticalDragMinHeight){A=au.verticalDragMinHeight}}ap.height(A+"px");i=t-A;aa(H)}}function ai(aG,aI,aF,s){var aK="before",aH="after",aJ;if(aI=="os"){aI=/Mac/.test(navigator.platform)?"after":"split"}if(aI==aK){aH=aI}else{if(aI==aH){aK=aI;aJ=aF;aF=s;s=aJ}}aG[aK](aF)[aH](s)}function az(aF,s,aG){return function(){G(aF,s,this,aG);this.blur();return false}}function G(aH,aF,aK,aJ){aK=b(aK).addClass("jspActive");var aI,s=function(){if(aH!=0){T(X+aH*au.arrowButtonSpeed,false)}if(aF!=0){S(H+aF*au.arrowButtonSpeed,false)}},aG=setInterval(s,au.arrowRepeatFreq);s();aI=aJ==c?"mouseup.jsp":"mouseout.jsp";aJ=aJ||b("html");aJ.bind(aI,function(){aK.removeClass("jspActive");clearInterval(aG);aJ.unbind(aI)})}function p(){w();if(av){al.bind("mousedown.jsp",function(aH){if(aH.originalTarget==c||aH.originalTarget==aH.currentTarget){var aG=b(this),s=setInterval(function(){var aI=aG.offset(),aJ=aH.pageY-aI.top;if(H+A<aJ){S(H+au.trackClickSpeed)}else{if(aJ<H){S(H-au.trackClickSpeed)}else{aF()}}},au.trackClickRepeatFreq),aF=function(){s&&clearInterval(s);s=null;b(document).unbind("mouseup.jsp",aF)};b(document).bind("mouseup.jsp",aF);return false}})}if(aB){F.bind("mousedown.jsp",function(aH){if(aH.originalTarget==c||aH.originalTarget==aH.currentTarget){var aG=b(this),s=setInterval(function(){var aI=aG.offset(),aJ=aH.pageX-aI.left;if(X+ao<aJ){T(X+au.trackClickSpeed)}else{if(aJ<X){T(X-au.trackClickSpeed)}else{aF()}}},au.trackClickRepeatFreq),aF=function(){s&&clearInterval(s);s=null;b(document).unbind("mouseup.jsp",aF)};b(document).bind("mouseup.jsp",aF);return false}})}}function w(){F&&F.unbind("mousedown.jsp");al&&al.unbind("mousedown.jsp")}function ar(){b("html").unbind("dragstart.jsp selectstart.jsp mousemove.jsp mouseup.jsp mouseleave.jsp");ap&&ap.removeClass("jspActive");h&&h.removeClass("jspActive")}function S(s,aF){if(!av){return}if(s<0){s=0}else{if(s>i){s=i}}if(aF==c){aF=au.animateScroll}if(aF){N.animate(ap,"top",s,aa)}else{ap.css("top",s);aa(s)}}function aa(aF){if(aF==c){aF=ap.position().top}aj.scrollTop(0);H=aF;var aI=H==0,aG=H==i,aH=aF/i,s=-aH*(W-v);if(ag!=aI||aD!=aG){ag=aI;aD=aG;C.trigger("jsp-arrow-change",[ag,aD,M,k])}u(aI,aG);V.css("top",s);C.trigger("jsp-scroll-y",[-s,aI,aG])}function T(aF,s){if(!aB){return}if(aF<0){aF=0}else{if(aF>j){aF=j}}if(s==c){s=au.animateScroll}if(s){N.animate(h,"left",aF,ab)}else{h.css("left",aF);ab(aF)}}function ab(aF){if(aF==c){aF=h.position().left}aj.scrollTop(0);X=aF;var aI=X==0,aH=X==j,aG=aF/j,s=-aG*(Q-ah);if(M!=aI||k!=aH){M=aI;k=aH;C.trigger("jsp-arrow-change",[ag,aD,M,k])}r(aI,aH);V.css("left",s);C.trigger("jsp-scroll-x",[-s,aI,aH])}function u(aF,s){if(au.showArrows){am[aF?"addClass":"removeClass"]("jspDisabled");ac[s?"addClass":"removeClass"]("jspDisabled")}}function r(aF,s){if(au.showArrows){at[aF?"addClass":"removeClass"]("jspDisabled");
x[s?"addClass":"removeClass"]("jspDisabled")}}function J(s,aF){var aG=s/(W-v);S(aG*i,aF)}function K(aF,s){var aG=aF/(Q-ah);T(aG*j,s)}function Y(aN,aL,aF){var aJ,aH,s=0,aG,aK,aM;try{aJ=b(aN)}catch(aI){return}aH=aJ.outerHeight();aj.scrollTop(0);while(!aJ.is(".jspPane")){s+=aJ.position().top;aJ=aJ.offsetParent();if(/^body|html$/i.test(aJ[0].nodeName)){return}}aG=aw();aK=aG+v;if(s<aG||aL){aM=s-au.verticalGutter}else{if(s+aH>aK){aM=s-v+aH+au.verticalGutter}}if(aM){J(aM,aF)}}function ay(){return -V.position().left}function aw(){return -V.position().top}function ad(){aj.unbind(Z).bind(Z,function(aI,aJ,aH,aF){var aG=X,s=H;T(X+aH*au.mouseWheelSpeed,false);S(H-aF*au.mouseWheelSpeed,false);return aG==X&&s==H})}function n(){aj.unbind(Z)}function ax(){return false}function I(){V.unbind("focusin.jsp").bind("focusin.jsp",function(s){if(s.target===V[0]){return}Y(s.target,false)})}function D(){V.unbind("focusin.jsp")}function P(){var aF,s;C.attr("tabindex",0).unbind("keydown.jsp").bind("keydown.jsp",function(aJ){if(aJ.target!==C[0]){return}var aH=X,aG=H,aI=aF?2:16;switch(aJ.keyCode){case 40:S(H+aI,false);break;case 38:S(H-aI,false);break;case 34:case 32:J(aw()+Math.max(32,v)-16);break;case 33:J(aw()-v+16);break;case 35:J(W-v);break;case 36:J(0);break;case 39:T(X+aI,false);break;case 37:T(X-aI,false);break}if(!(aH==X&&aG==H)){aF=true;clearTimeout(s);s=setTimeout(function(){aF=false},260);return false}});if(au.hideFocus){C.css("outline","none");if("hideFocus" in aj[0]){C.attr("hideFocus",true)}}else{C.css("outline","");if("hideFocus" in aj[0]){C.attr("hideFocus",false)}}}function O(){C.attr("tabindex","-1").removeAttr("tabindex").unbind("keydown.jsp")}function B(){if(location.hash&&location.hash.length>1){var aG,aF;try{aG=b(location.hash)}catch(s){return}if(aG.length&&V.find(aG)){if(aj.scrollTop()==0){aF=setInterval(function(){if(aj.scrollTop()>0){Y(location.hash,true);b(document).scrollTop(aj.position().top);clearInterval(aF)}},50)}else{Y(location.hash,true);b(document).scrollTop(aj.position().top)}}}}function af(){b("a.jspHijack").unbind("click.jsp-hijack").removeClass("jspHijack")}function m(){af();b("a[href^=#]").addClass("jspHijack").bind("click.jsp-hijack",function(){var s=this.href.split("#"),aF;if(s.length>1){aF=s[1];if(aF.length>0&&V.find("#"+aF).length>0){Y("#"+aF,true);return false}}})}b.extend(N,{reinitialise:function(aF){aF=b.extend({},aF,au);an(aF)},scrollToElement:function(aG,aF,s){Y(aG,aF,s)},scrollTo:function(aG,s,aF){K(aG,aF);J(s,aF)},scrollToX:function(aF,s){K(aF,s)},scrollToY:function(s,aF){J(s,aF)},scrollBy:function(aF,s,aG){N.scrollByX(aF,aG);N.scrollByY(s,aG)},scrollByX:function(s,aG){var aF=ay()+s,aH=aF/(Q-ah);T(aH*j,aG)},scrollByY:function(s,aG){var aF=aw()+s,aH=aF/(W-v);S(aH*i,aG)},animate:function(aF,aI,s,aH){var aG={};aG[aI]=s;aF.animate(aG,{duration:au.animateDuration,ease:au.animateEase,queue:false,step:aH})},getContentPositionX:function(){return ay()},getContentPositionY:function(){return aw()},getIsScrollableH:function(){return aB},getIsScrollableV:function(){return av},getContentPane:function(){return V},scrollToBottom:function(s){S(i,s)},hijackInternalLinks:function(){m()}})}f=b.extend({},b.fn.jScrollPane.defaults,f);var e;this.each(function(){var g=b(this),h=g.data("jsp");if(h){h.reinitialise(f)}else{h=new d(g,f);g.data("jsp",h)}e=e?e.add(g):g});return e};b.fn.jScrollPane.defaults={showArrows:false,maintainPosition:true,clickOnTrack:true,autoReinitialise:false,autoReinitialiseDelay:500,verticalDragMinHeight:0,verticalDragMaxHeight:99999,horizontalDragMinWidth:0,horizontalDragMaxWidth:99999,animateScroll:false,animateDuration:300,animateEase:"linear",hijackInternalLinks:false,verticalGutter:4,horizontalGutter:4,mouseWheelSpeed:10,arrowButtonSpeed:10,arrowRepeatFreq:100,arrowScrollOnHover:false,trackClickSpeed:30,trackClickRepeatFreq:100,verticalArrowPositions:"split",horizontalArrowPositions:"split",enableKeyboardNavigation:true,hideFocus:false}})(jQuery,this);
//]]>
</script>

<script>
$(document).ready(function() {
$('.scroll-pane').jScrollPane({showArrows: true});
});
</script>

2. Then locate this tag:
<body>
Or this line:
<body expr:class='&quot;loading&quot; + data:blog.mobileClass'>
Under any of these two add this:
<div class='scroll-pane' id='blog-container'>
3. Finally search for the </body> and above it paste this:
</div>
Save the changes and that's all. In green you will see where you can change the scrollbar colors and its different areas, or add other styles, such as shadows, rounded corners, etc..
If you want the top and bottom limits to not appear (as in the example) then remove what is in red.

Remember that the script uses jQuery, so if you already have it, then don't put the script again (the first line of code). If you are using Scriptaculous or Mootools, then you should make some slight changes in order to make it work.

Maybe the code might appear long but better add the scripts directly in the template, so the scripts will always be available and load faster. Regardless of all of this the end result is quite aesthetic, don't you think?
Read more ...


Friday, 20 September 2013

4 Different Styles For the Popular Posts Widget

Blogger allows us to easily add a "Popular Posts" widget, that we select from its list of gadgets, and we can do that by going to the "Layout" of our Blog.

This gadget, as the name implies, shows which are the most visited blog posts, and you can set it to display the info you want in four possible combinations: (1) only the title of the post, (2) a thumbnail of the image and the post title, (3) post title with a summary, and (4) post title with a thumbnail and a post snippet.

This is an element that you shouldn't miss in your blog because it encourages your visitors to navigate through your content, which can result in higher income if you're monetizing your blog because it would generate an increase in the number of pages visited, and in turn, can attract the users' interest to subscribe to the blog and to read interesting content.

Preliminary steps: Add the gadget, if you haven't done it yet.


1. Select the "Layout" tab and add the "Popular Posts" gadget in that part of your blog you want to appear, such as in your sidebar, by clicking on "Add a Gadget".

2. Configure the widget to show only the post titles. You can do this by clicking on the "image thumbnail" and "snippet" checkboxes, as shown in the following image.

3. After configuring the widget, save the changes by clicking on Save, and then Save arrangement.

How to add the CSS to create the style of the Popular Posts widget


1. Choose a style, then copy the CSS that appears below the image that shows the style.

2. Select the "Template" tab, then click on Customize > Advanced > Add CSS and then paste the CSS style that you like the most.

blogger tutorials
3. Once you add the CSS, Save changes by clicking on the "Apply to Blog" button.

And that's it! I've already customized the popular posts widget, when it only shows post titles.

Styles

Here is the CSS of each style, just choose the one you like the best and put it on your blog. You can see each of these styles in action in the following demo blog:

http://demo-blog343.blogspot.com

Style 1:
blogger gadgets, blogger widgets
#PopularPosts1 h2{
padding:7px 0 3px 0;
width:100%;
margin:0;
font-size:1.3em;
text-indent:-12px;
font-size:18px;
text-align:center;
color: #000; /* Color of the widget's title */
}
#PopularPosts1 ul{
list-style:none;
counter-reset:li;
padding:8px 0px 1px;
left:-8px;
width:290px;
}
#PopularPosts1 li{
position:relative;
margin:0 0 10px 0;
padding: 3px 2px 0 7px;
left:-5px;
width:285px;
border:1px solid #ccc;
}
#PopularPosts1 ul li:before{
content:counter(li);
counter-increment:li;
position:absolute;
display:block;
top:-5px;
left:-5px;
font-size:18px;
width:14px;
margin:0 0 10px 0;
padding:4px 4px 4px 3px;
color:#333;
text-align:left;
background:#E8E8E8;
text-indent:2px;
}
#PopularPosts1 ul li:after{
content:"";
position:absolute;
top:-5px;
left:15px;
width: 0px;
height: 0px;
border-top:5px outset transparent;
border-left:5px solid #aeaeae;
}

#PopularPosts1 ul li a{
font-size:17px; /* Font size of the links */
color:#444; /* Color of the links */
font-style: italic;
margin-left:17px;
display:block;
min-height:25px;
text-decoration:none;
padding:0 4px 3px 0;
}
#PopularPosts1 ul li:hover{
background:#f9f9f9;
border:1px solid #aaa;
}
#PopularPosts1 ul li a:hover{
color:#0174DF;
}

Style 2:
blogger gadgets, blogger widgets
#PopularPosts1 h2{
position:relative;
padding:8px 10px 6px 10px;
width:100%;
margin:0;
font-size:17px;
background: #bada55;
color:#222; /* Color of the widget's title */
text-align:center;
}
#PopularPosts1 h2:before{
position:absolute;
content:"";
top:-6px;
right:-5px;
width: 0px;
height: 0px;
border-bottom:24px outset transparent;
border-top:24px outset transparent;
border-right:24px solid #fff; /* Color of the triangle */
}

#PopularPosts1 h2:after{
position:absolute;
content:"";
top:-7px;
left:-5px;
width: 0px;
height: 0px;
border-bottom:24px outset transparent;
border-top:24px outset transparent;
border-left:24px solid #fff; /* Color of the triangle */
}

#PopularPosts1 ul{
list-style:none;
counter-reset:li;
padding:10px;
left:-8px;
width:100%;
}

#PopularPosts1 li{ /* Styles of each element */
width:100%;
position:relative;
left:0;
margin:0 0 1px 12px;
padding:4px 5px;
}

#PopularPosts1 ul li:before{ /* style of the numbers */
content:counter(li);
counter-increment:li;
position:absolute;
top:2px;
left:-23px;
font-size:35px; /* Font size of the numbers */
width:20px;
color:#666; /* Color of the text */
}
#PopularPosts1 ul li a{
display:block;
position:relative;
left:-30px;
width:100%;
margin:0;
padding: 9px 3px 10px 29px;
font-size:15px; /* Font size of the links */
font-style: italic;
color:#333; /* Color of the links */
text-decoration:none;
transition: all .1s ease-in-out;
}
#PopularPosts1 ul li a:hover{
color:#3366ff;
margin-left:3px;
}

Style 3:
blogger gadgets, blogger widgets
#PopularPosts1 h2{
position:relative;
right:-2px;
padding:8px 63px 6px 17px;
width:100%;
margin:0;
font-size:16px;
background:#C00000; /* Background color */
color:#f2f2f2; /* Color of the widget's title */
text-align:left;
text-indent:18px;
}
#PopularPosts1 h2:before{
position:absolute;
content:"";
top:33px;
right:0px;
width: 0px;
height: 0px;
border-bottom:12px outset transparent;
border-left:12px solid #800000;
}
#PopularPosts1 h2:after{
position:absolute;
content:"";
top:-6px;
left:-5px;
width: 0px;
height: 0px;
border-bottom:24px outset transparent;
border-top:24px outset transparent;
border-left:24px solid #fff;
}
#PopularPosts1 ul{
list-style:none;
counter-reset:li;
padding:10px;
left:-8px;
width:100%;
}
#PopularPosts1 li{
width:100%;
position:relative;
left:0;
margin:7px 0 16px 12px;
padding:10px  4px 0 5px;
}
#PopularPosts1 ul li:before{
content:counter(li);
counter-increment:li;
position:absolute;
top:-2px;
left:-20px;
font-size:33px;
width:20px;
color:#888888;
}

#PopularPosts1 ul li a{
display:block;
font-size:14px; /* Font size of the links */
color: #666; /* Color of the links */
text-decoration:none;
transition: all .1s ease-in-out;
}
#PopularPosts1 ul li a:hover{
color:#3366FF;
margin-left:3px;
}

Style 4:
blogger gadgets, blogger widgets
#PopularPosts1 h2{
padding:8px 10px 3px 0;
width:100%;
margin:0;
font-size:16px;
position:relative;
left:-20px;
display:block;
border-bottom:2px solid #ccc;
}
#PopularPosts1 ul{
list-style:none;
counter-reset:li;
padding:10px;
width:100%;
}
#PopularPosts1 li{ /* Styles of each element */
width:100%;
position:relative;
left:0;
margin:0 0 6px 10px;
padding:4px 5px;
}
#PopularPosts1 ul li:before{ /* Style of the numbers */
content:counter(li);
counter-increment:li;
position:absolute;
top:3px;
left:-39px;
font-size:21px;
width:28px;
height:28px;
border-radius: 50%;
color:#777; /* Text color */
border: 2px solid #ddd; /* Rounded border color */
padding:0;
text-indent:9px;
}
#PopularPosts1 ul li a{
display:block;
position:relative;
left:-45px;
width:100%;
margin:0;
min-height:28px;
padding: 5px 3px 3px 39px;
color:#333; /* color of the links */
text-decoration:none;
font-size:14px; /* Font size of the links */
font-style: italic;

}
#PopularPosts1 ul li a:hover{
color:#3366ff;
margin-left:3px;
}

Final Notes

All the CSS is valid. I just have to mention that the numbering is not visible in Internet Explorer 7, since that version of the browser does not support properties that make the numbers appear. For example in the 4th style, the circles look squared in IE8 and earlier versions since, these versions do not support a property that makes them look as circles.

Fonts will be inherited from the template, since they have not been declared in the CSS.
Read more ...


Wednesday, 18 September 2013

Vertical drop down menu with jQuery

jGlideMenu is a vertical menu that can be dragged and dropped so that the reader can place it anywhere, and in addition, he can browse through the tabs in a very peculiar manner that comes with a sliding effect giving a sexy touch.

One of the advantages is that it can store a large number of links and can be removed anytime if we want.

vertical menu, menu for blogger

To understand this menu better and to see it in action, visit this demo blog. There we can drag the menu, navigate through its tabs or close.

To add this vertical menu on your blog, just follow these steps:

1) From your Blogger dashboard, go to Template > Edit HTML and before the </head> tag, add these scripts:
<script src='http://ajax.googleapis.com/ajax/libs/jquery/1.7.1/jquery.min.js' type='text/javascript'/>
<script src='http://ajax.googleapis.com/ajax/libs/jqueryui/1.7.1/jquery-ui.min.js' type='text/javascript'/>
<script src='http://helplogger.googlecode.com/svn/trunk/jQuery.jGlideMenu.min.js' type='text/javascript'/>

<script type='text/javascript'>
//<![CDATA[
$(document).ready(function(){
$('#jGlide_001').jGlideMenu({
tileSource : '.jGlide_001_tiles' ,
demoMode : false
}).show();

$('#switch').click(function(){$(this).jGlideMenuToggle();});
});
//]]>
</script>
2) Now paste before ]]></b:skin> these styles:
.jGM_box {
position: absolute; /* Change absolute with fixed if you want it to float */
top: 50px; /* Distance from above */
right: 760px; /* Distance from right */
width: 227px;
height: 317px;
background: #fff; /* Background color */
margin: 0;
padding: 0;
border: 1px solid #ccc; /* Border */
overflow: hidden;
}
.jGM_header {
position: absolute;
top: 0;
left: 0;
height: 18px;
width: 227px;
background: #d1d1d1; /* Background color for the up bar */
color: #fff;
text-align: right;
vertical-align: middle;
line-height: 18px;
cursor: move;
}
.jGM_header a {
margin-right: 12px;
text-decoration: none;
color: #000 !important;
cursor: pointer;
}
.jGM_wrapper {
position: absolute;
top: 19px;
left: 0;
width: 2270px;
height: 288px;
margin: 0;
padding: 0;
border: 0;
}
.jGM_tile {
position: absolute;
top: 0;
left: 7px;
width: 213px;
height: auto;
overflow: hidden;
margin: 0;
padding: 0;
border: 0;
display: block;
}
.jGM_cats {
width: 100%;
height: 64px;
overflow: hidden;
vertical-align: middle;
text-align: left;
}
.jGM_cats h4 {
font-family: Verdana,Arial,serif;
font-size: 1.8em;
margin: 0;
padding: 2px 0;
line-height: 1.8em;
color: #414141;
font-weight: normal;
}
.jGM_cats p {
font-family: Verdana,tahoma,arial;
font-size: 1em; /* Font size of the description */
margin: 0;
padding: 0;
line-height: 1.2em;
color: #858585; /* Description color */
font-weight: normal;
}
.jGM_pager {
height: 18px;
width: 213px;
line-height: 18px;
margin: 0;
border: 0;
padding: 0;
background: #f6f6f6;
text-align: center;
vertical-align: middle;
}
.jGM_pager a {
text-decoration: none;
font-weight: bold;
text-decoration: none;
display: block;
}
.jGM_pager a:hover { background: #d1d1d1; }
.jGM_pager img { border: 0; margin: 6px 0; }
.jGM_content {
width: 213px;
height: 150px;
margin: 1px 0;
padding: 0;
border: 0;
overflow: hidden;
}
.jGM_content a {
font-family: Tahoma,arial;
text-decoration: none;
color: #333 !important;
height: 18px;
width: 100%;
display: block;
line-height: 18px;
padding: 0 0 0 10px;
background-color: #e6e7e9;
margin: 1px 0;
}
.jGM_content a:hover {
color: #fff !important;
background-color: #4D4E67; /* Bar color on mouseover */
}
.jGM_more {
background-image: url(https://blogger.googleusercontent.com/img/b/R29vZ2xl/AVvXsEjuUFVtVZWTe-AiNgUrl8-mp9tiROmh0cgzxC3QA6jxpGF3JhW322KQ2RIXLp1rG7PBJKeCJViA2NqH8LtxE-93xctdlh9DNVKMgCzF40HA1rd1viL8juaTOujMKgUdNaRQl6KV4n-y9rQ/s1600/arrow.gif);
background-repeat: no-repeat;
background-position: 203px 50%;
}
.jGM_back {
position: absolute;
top: 255px;
right: 0;
height: 18px;
width: 52px;
background: #d1d1d1;
line-height: 18px;
vertical-align: middle;
text-align: center;
margin: 10px 0 0 0;
padding: 0;
border: 0;
z-index: 99;
}
.jGM_back a {
height: 100%;
width: 100%;
text-decoration: none;
color: #000 !important; /* Color of the "Back" link */
display: block;
}
.jGM_back a:hover {
color: #fff !important; /* Color of the "Back" link on mouseover */
background: #4D4E67;
}
.jGM_reset {
position: absolute;
top: 255px;
right: 62px;
height: 18px;
width: 52px;
background: #d1d1d1;
line-height: 18px;
vertical-align: middle;
text-align: center;
margin: 10px 0 0 0;
padding: 0;
border: 0;
z-index: 99;
}
.jGM_reset a {
height: 100%;
width: 100%;
text-decoration: none;
color: #000 !important; /* Color of the "Home" link */
display: block;
}
.jGM_reset a:hover {
color: #fff !important; /* Color of the "Home" link on mouseover */
background: #4D4E67;
}
3) Now go to Layout and paste the structure of the menu inside a HTML/Javascript gadget:
<div class="jGM_box" id="jGlide_001">

<!-- Here all the links of the first level -->
<ul id="tile_001" class="jGlide_001_tiles" title="Menu" alt="Description of the first level">
<li rel="tile_002">Link 1</li>
<li rel="tile_003">Link 2</li>
<li rel="tile_004">Link 3</li>
<li rel="tile_006">Link 4</li>
<li rel="tile_007">Link 5</li>
<li><a href="URL address">Link 6</a></li>
<li><a href="URL address">Link 7</a></li>
<li><a href="URL address">Link 8</a></li>
<li><a href="URL address">Link 9</a></li>
<li><a href="URL address">Link 10</a></li>
<li><a href="URL address">Link 11</a></li>
</ul>

<!-- Here all the links of the second level -->
<ul id="tile_002" class="jGlide_001_tiles" title="Menu" alt="Description of the second level">
<li rel="tile_005">Link 1.1</li>
<li><a href="URL address">Link 1.2</a></li>
<li><a href="URL address">Link 1.3</a></li>
<li><a href="URL address">Link 1.4</a></li>
</ul>

<ul id="tile_003" class="jGlide_001_tiles" title="Menu" alt="Description of the second level">
<li><a href="URL address">Link 2.1</a></li>
<li rel="tile_008">Link 2.2</li>
<li><a href="URL address">Link 2.3</a></li>
</ul>

<ul id="tile_004" class="jGlide_001_tiles" title="Menu" alt="Description of the second level">
<li><a href="URL address">Link 3.1</a></li>
<li><a href="URL address">Link 3.2</a></li>
<li><a href="URL address">Link 3.3</a></li>
</ul>


<ul id="tile_006" class="jGlide_001_tiles" title="Menu" alt="Description of the second level">
<li><a href="URL address">Link 4.1</a></li>
<li><a href="URL address">Link 4.2</a></li>
<li><a href="URL address">Link 4.3</a></li>
</ul>

<ul id="tile_007" class="jGlide_001_tiles" title="Menu" alt="Description of the second level">
<li><a href="URL address">Link 5.1</a></li>
<li><a href="URL address">Link 5.2</a></li>
</ul>


<!-- Here all the links of the third level -->
<ul id="tile_005" class="jGlide_001_tiles" title="Menu" alt="Description of the third level">
<li><a href="URL address">Link 1.1.1</a></li>
<li><a href="URL address">Link 1.1.2</a></li>
</ul>


<ul id="tile_008" class="jGlide_001_tiles" title="Menu" alt="Description of the third level">
<li><a href="URL address">Link 1.2.1</a></li>
<li><a href="URL address">Link 1.2.2</a></li>
</ul>

</div>
Add the URLs of the links and the names of the tabs and that's it.
If you want to add more links to the first level, then add another line like this:
<li><a href="URL address">Link 12</a></li>
If you want to add another level to the link, then the line should be like this:
<li rel="tile_0010">Link 5</li>
Then in the area of ​​the second or third level, add a piece like this:
<ul id="tile_0010" class="jGlide_001_tiles" title="Menu" alt="Description of the second level">
<li><a href="URL address">Link 5.1</a></li>
<li><a href="Url address">Link 5.2</a></li>
</ul>
Here you should keep something in mind, if you look closely the link takes the REL attribute which must be the same as the ID we put on the second level, these IDs should not repeat and always be unique.
Yes, it sounds complicated, but once you understand the concept, you'll see that is actually pretty simple.

In the area of ​​the styles, there are the parts that can be customized. If you want the menu to be static, let's say you want to add it in the sidebar, then delete the first code of the script that is in italics. And in the CSS styles, remove this part:
position: absolute; /* Change absolute with fixed if you want it to float */
top: 50px; /* Distance above */
right: 760px; /* Distance to the right */
When there are many links then, there will be showing some arrows, so when you mouseover them, it will show the rest of the links either up or down.

Throughout the menu structure we can change the Menu name and the descriptions as well.

As this menu is made with JQuery, it is recommended to verify to have only one version of it.
Read more ...


Poll